This section guides Speaker Ready Room helpers through the process of uploading a speaker’s presentation file and managing related details.
Important File Requirement
All presentation files must be in PPTX format (PowerPoint). Any video content (MP4 H.264) must be embedded within the PowerPoint file before upload. Standalone MP4 files cannot be accepted.
📌 Note for Speaker Ready Room Helpers
While speakers are expected to complete the upload process independently, it is essential that helpers actively observe each speaker during their upload session. Pay close attention to any signs of hesitation, confusion, or technical difficulty. If a speaker appears to struggle with any step — from locating their name to answering consent questions or uploading the correct file — offer immediate assistance. This is why it is critical that all helpers are thoroughly familiar with every step of this workflow, so you can guide speakers smoothly and confidently through the process.
Step-by-Step Upload Guide
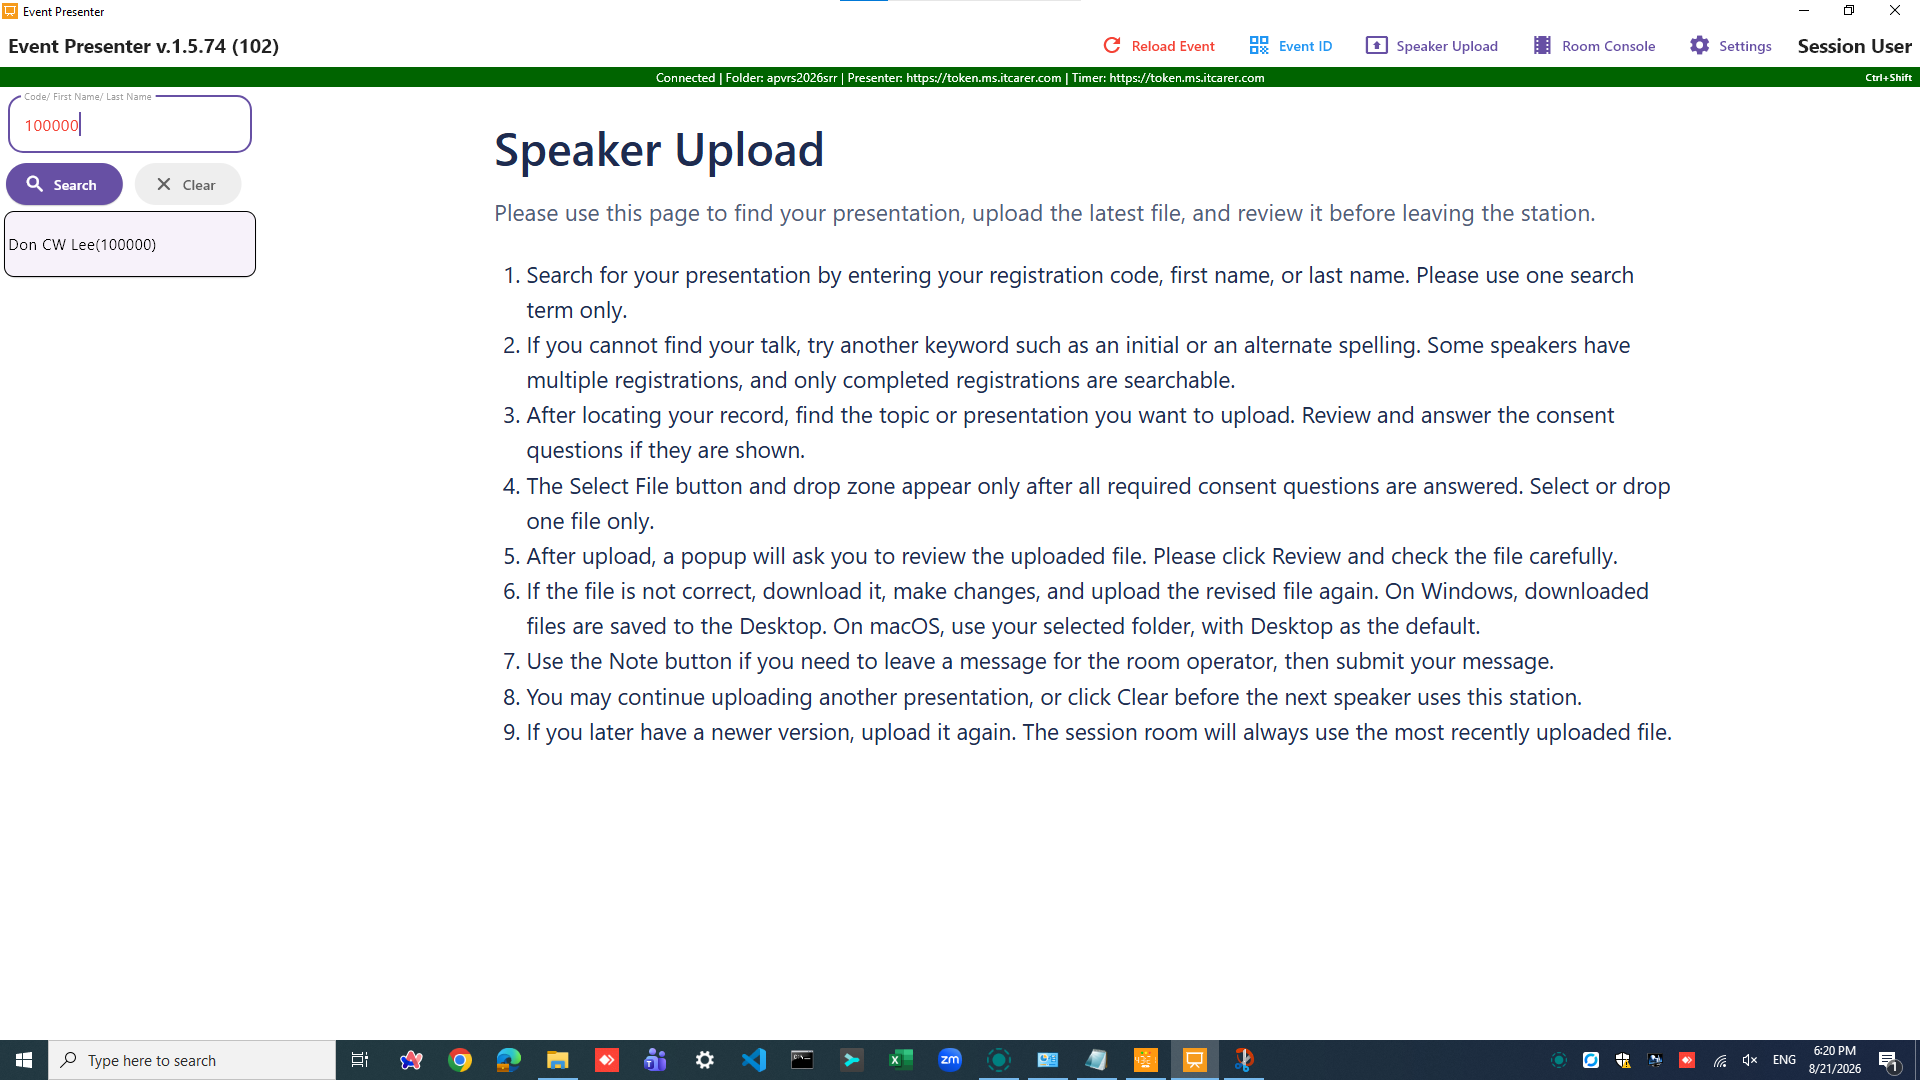
Navigate to the Upload Workspace
From the main menu bar, select ‘Speaker Upload’.
Read through the instructions display in the main panel.
Locate the Speaker
On the left panel, search for the speaker using their:
- Registration Code (the one on their Badge),
- First name, OR Last name, NOT both.
A list of matching speakers will appear. Select the correct speaker from this list.
Select the Presentation Topic
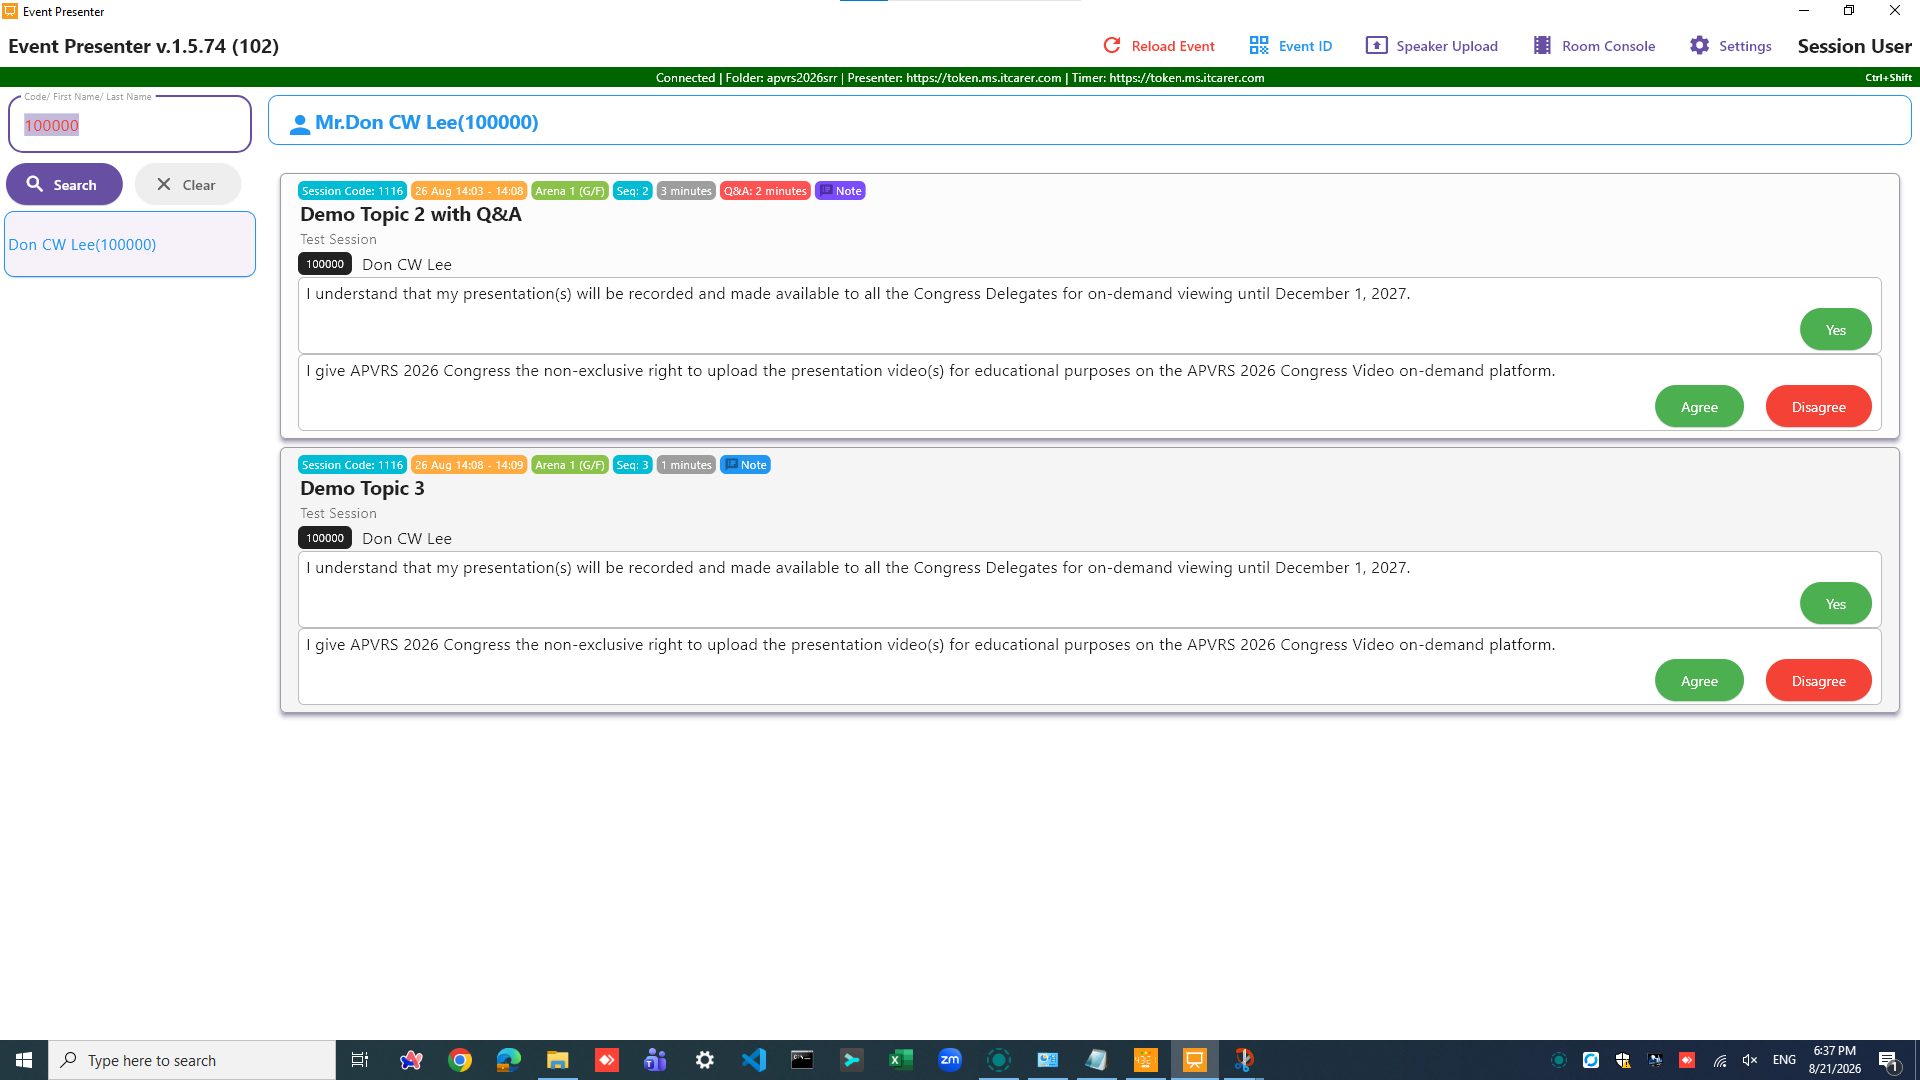
Once a speaker is selected:
- The right panel will display the speaker’s name and registration code at the top.
- Below that is a list of their presentations.
- For each presentation, review the details: Session Code, Date/Time, Venue, Presentation Sequence, and allocated times for Presentation and Q&A.
Speaker Consent
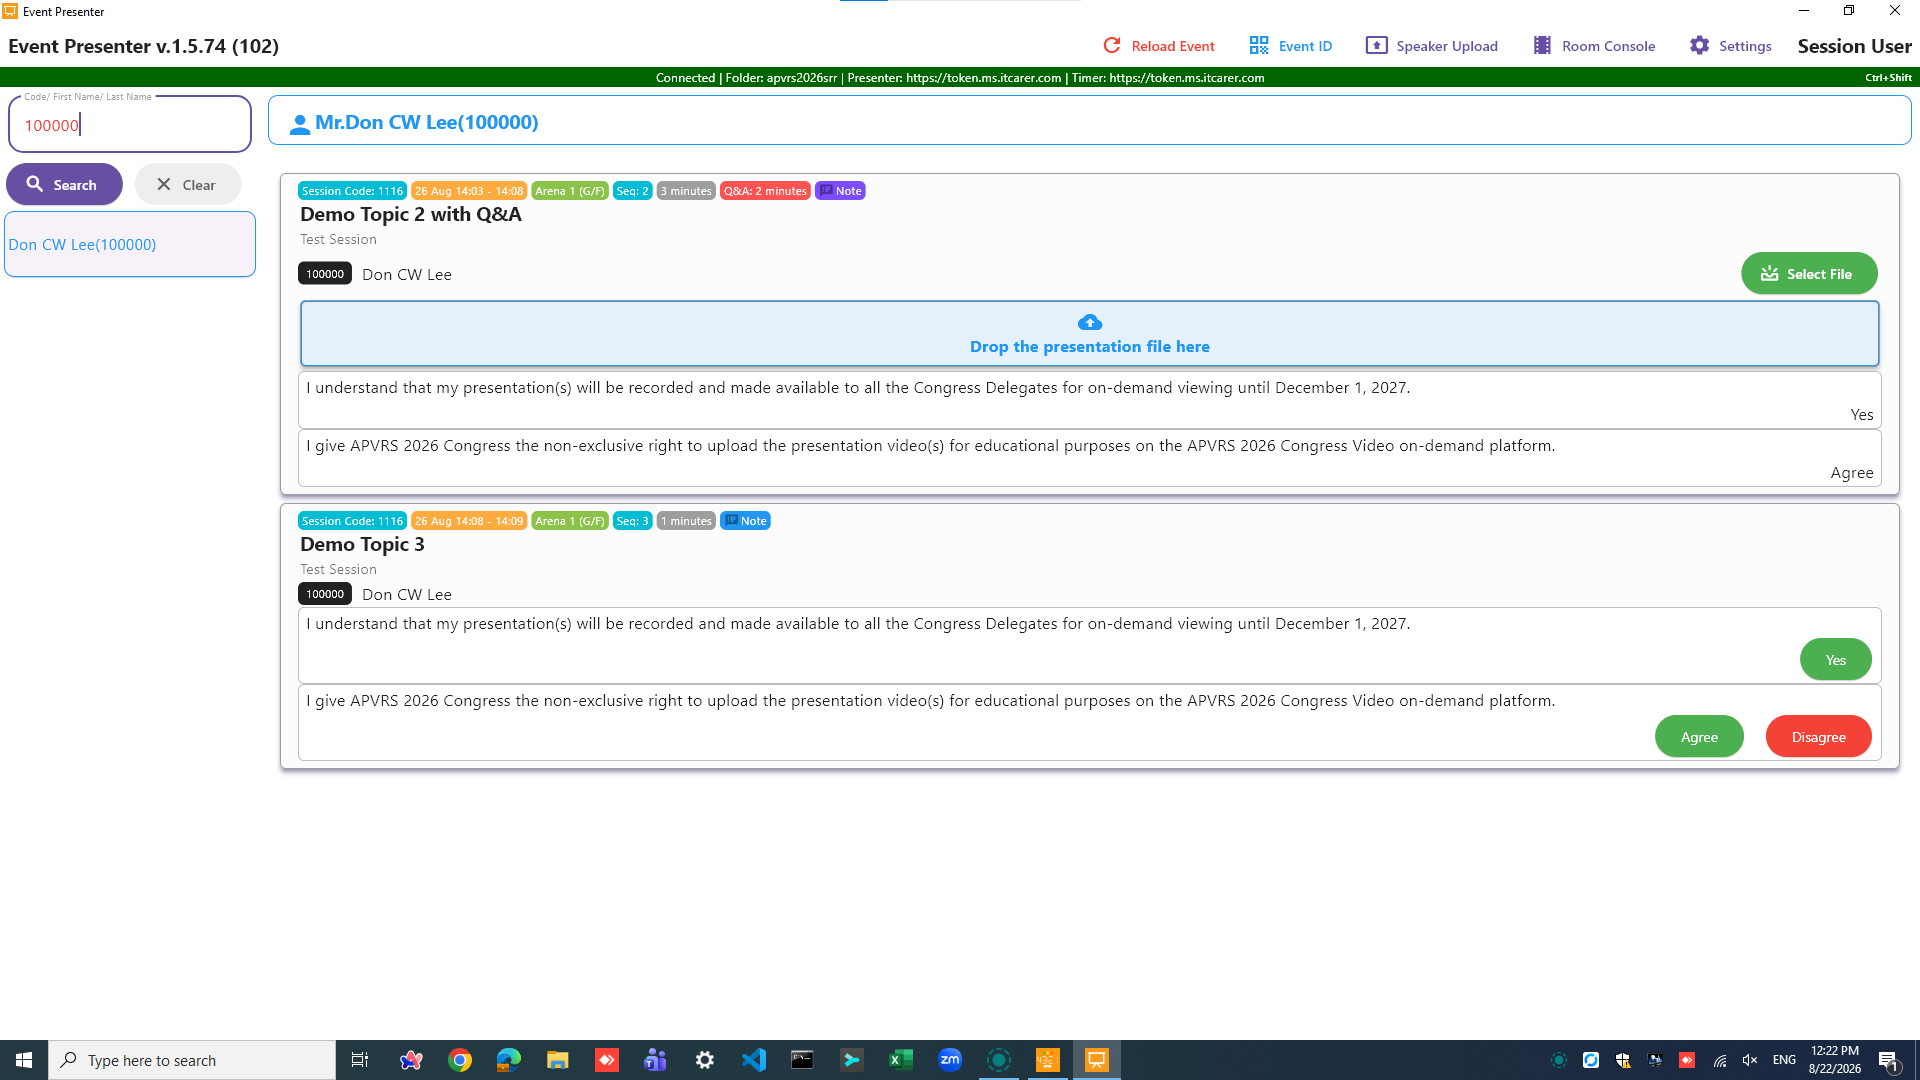
Before uploading, the speaker must answer two mandatory consent questions related to the presentation.
- The [Select File] button will only appear after both questions have been answered.
Upload the File
- Most speakers will provide their file on a USB drive. Insert the drive into the computer.
- Click the [Select File] button.
- In the file dialog, navigate to and select the correct PPTX file from the speaker’s USB drive.
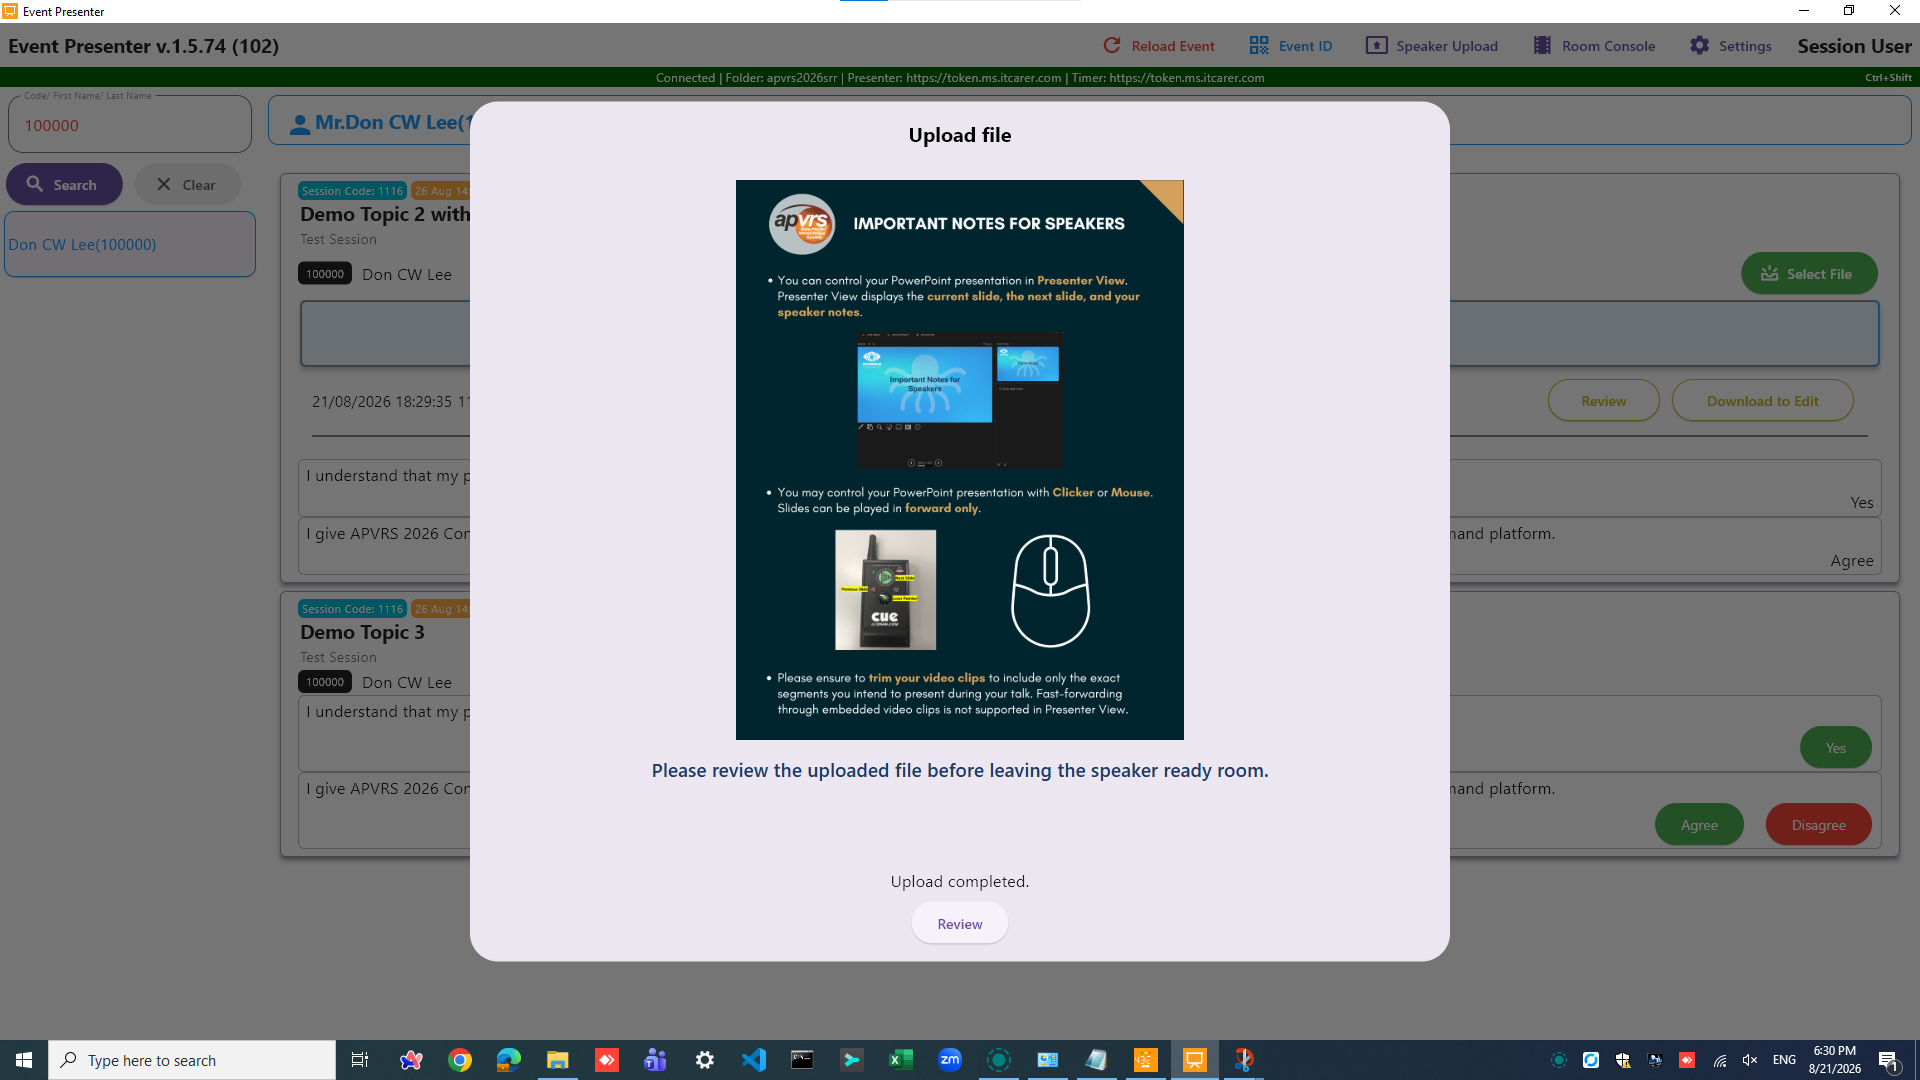
- During the upload, a popup screen with the podium setup will be shown. Please remind the speaker to take a look.
- Upon successful upload, the file will be automatically renamed and listed with a confirmation timestamp.

Post-Upload Review & Notes to Operator
- ALWAYS REVIEW THE FILE: Crucially, remind the speaker to review the uploaded file by clicking the [Review] button. Run the slideshow in full-screen mode to verify all content, including embedded videos and animations, works correctly.
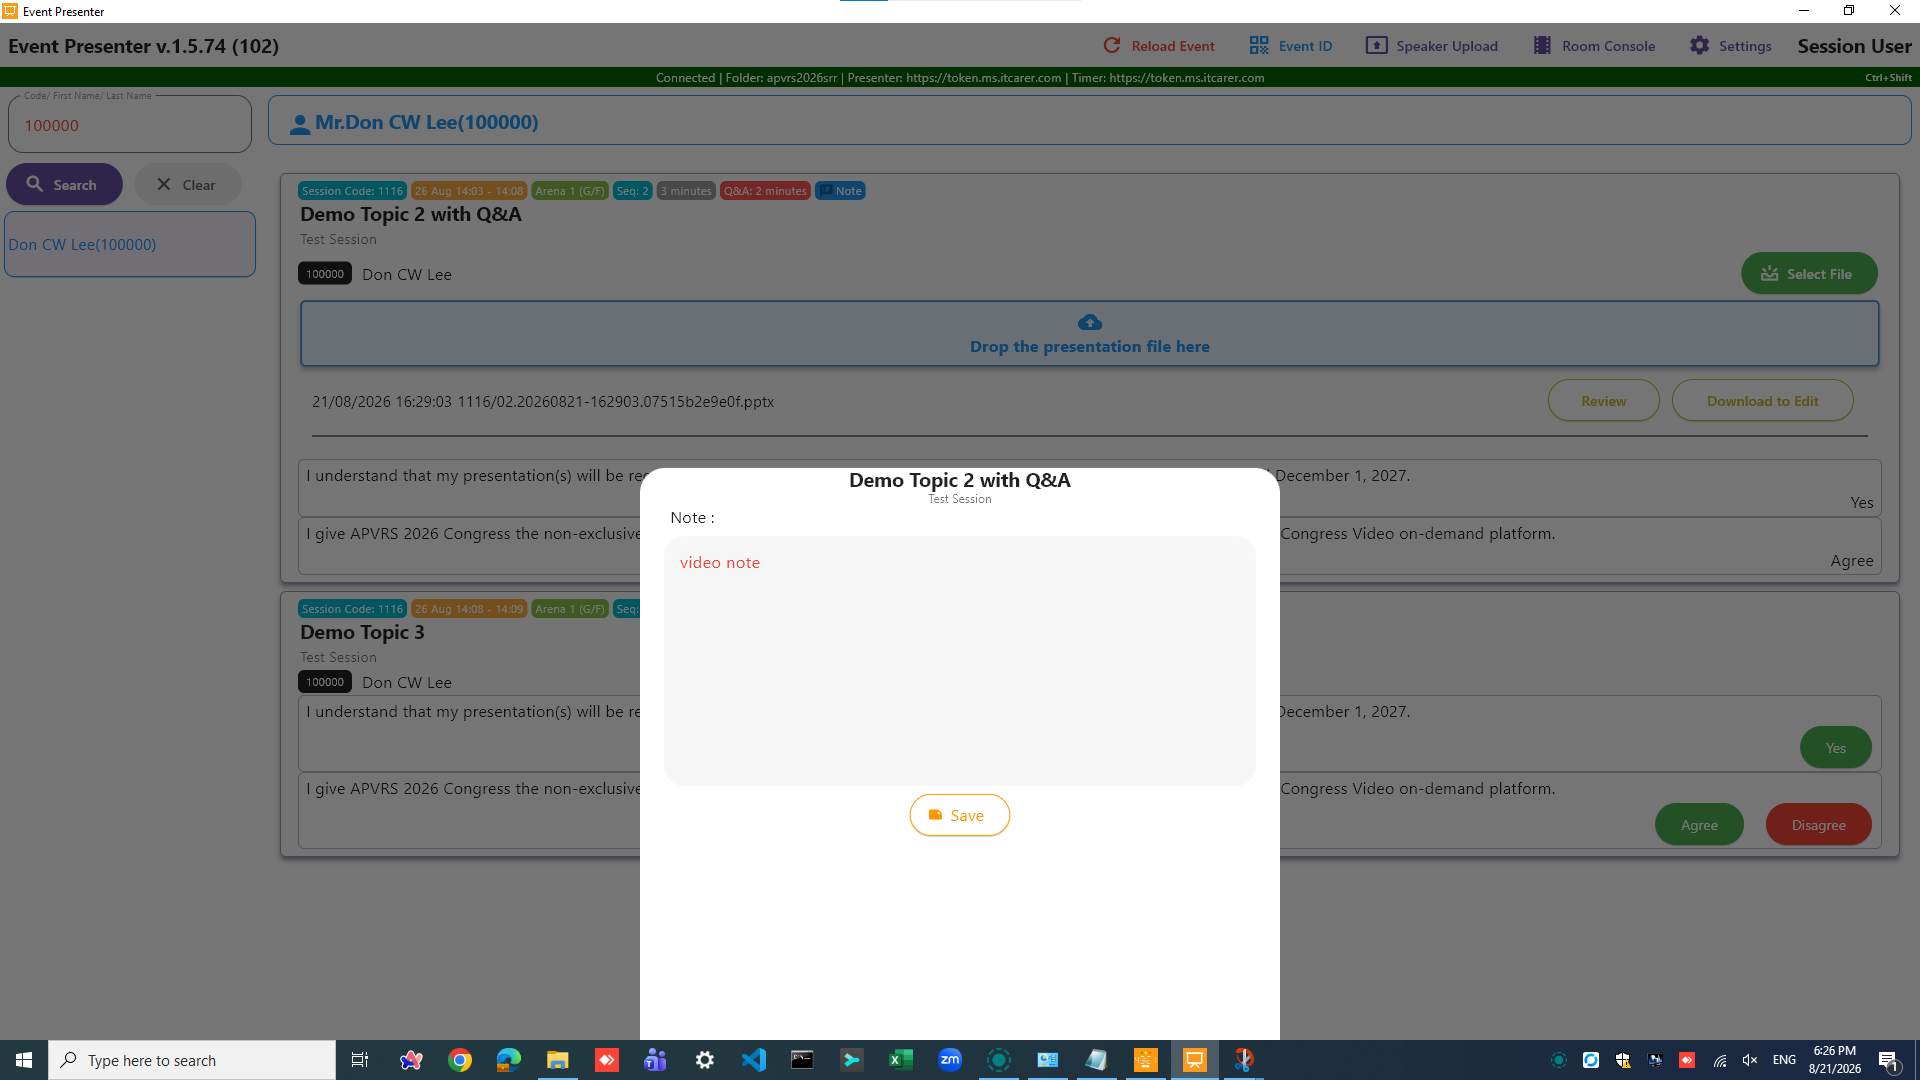
- Add Operator Notes: If the speaker has specific instructions for the session room operator (e.g., “advance slides for me,” “play video on click”), click the [Note] button. A dialog box will open where you can write down these instructions. Click [Save] when finish.
File Editing
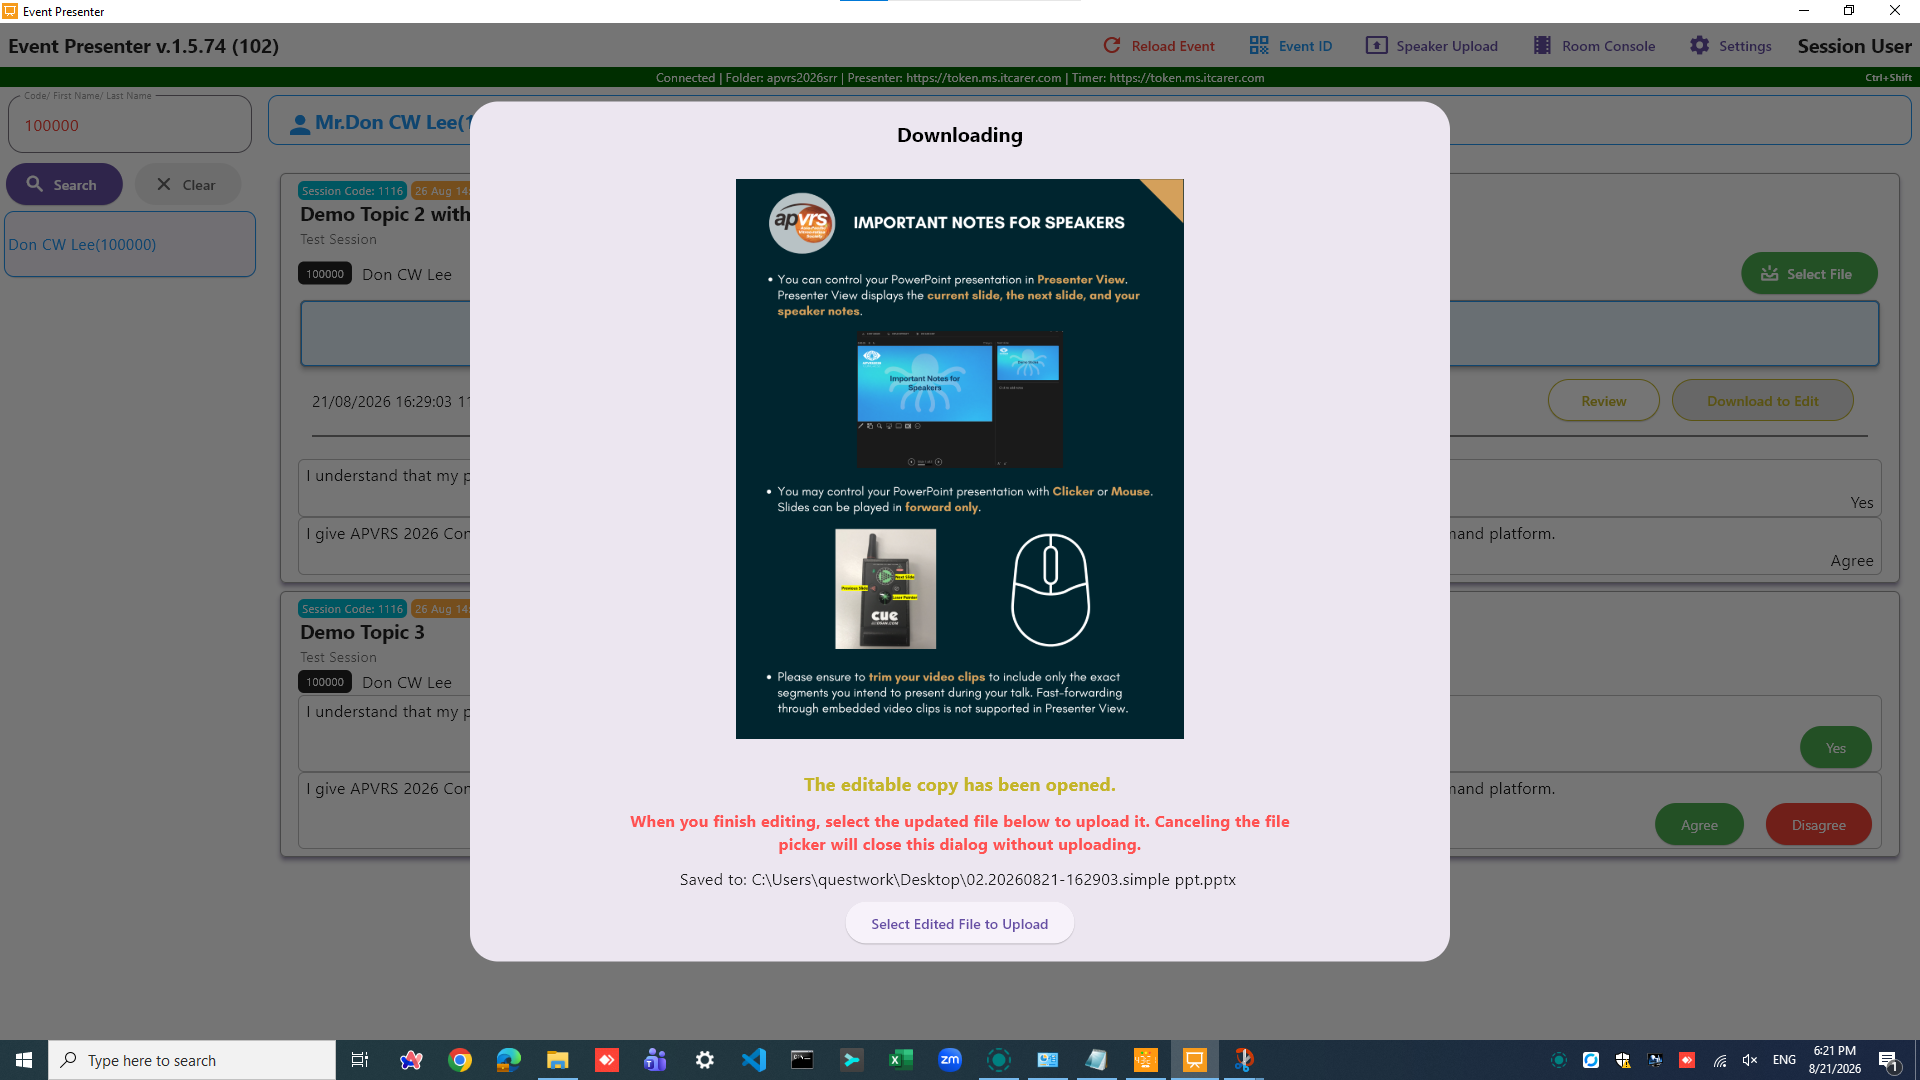
If a speaker wants to edit a presentation that has already been uploaded, please follow the 3-steps process, [Download] > [Edit] > [Re-upload].
- Download: On the topic detail panel, locate and click the [Download to Edit] button to save the current version of the PPTX file to the desktop of your local computer.
- Edit: Make any necessary changes to the downloaded PowerPoint file. Ensure all videos remain properly embedded in PPTX format.
- Re-upload: Locate the [Select Edited File to Upload] button on the popup. Click it to open the Windows Explorer, select and upload the newly edited file. The new file will replace the previous one.
⚠️ Caution: Editing & Re‑Upload Process
All file editing is done on the local computer. Once the editing is completed, the edited PPTX file MUST be re‑uploaded to the system using the [Select File] button. After re‑upload, always click [Review] again to run the full slideshow. Please confirm that all changes, embedded videos, animations, transition, and timing work as expected. The system will NOT automatically upload the file – only a manual re‑upload could replace the previous version.